Followers

Saturday, November 29, 2014

Open-Minded Crafting Fun - Challenge #24 Midway 2nd Post.

Good morning everyone!! Here is my 2nd post for our midway challenge at Open-Minded Crafting Fun! One more week to go to get in on this challenge!! And we have some wonderful sponsors for Challenge #24 .. be sure to join us :)


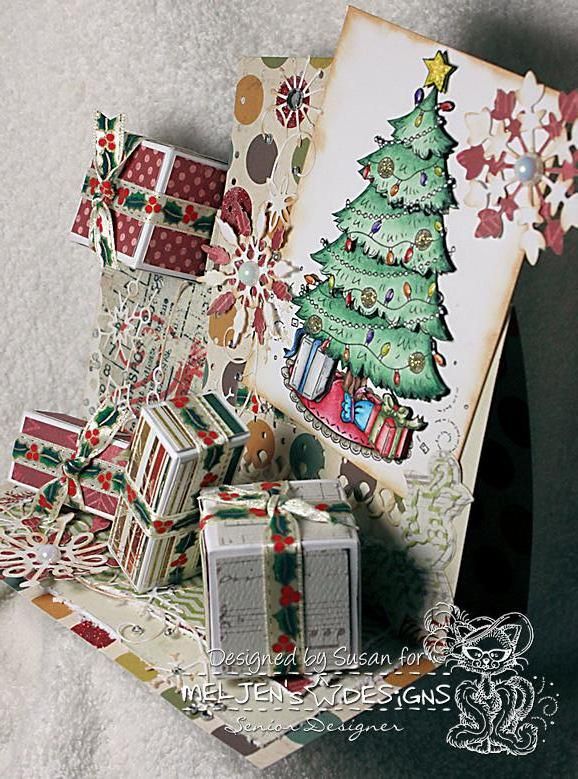
Here is what I have come up with using an image from The East Wind:


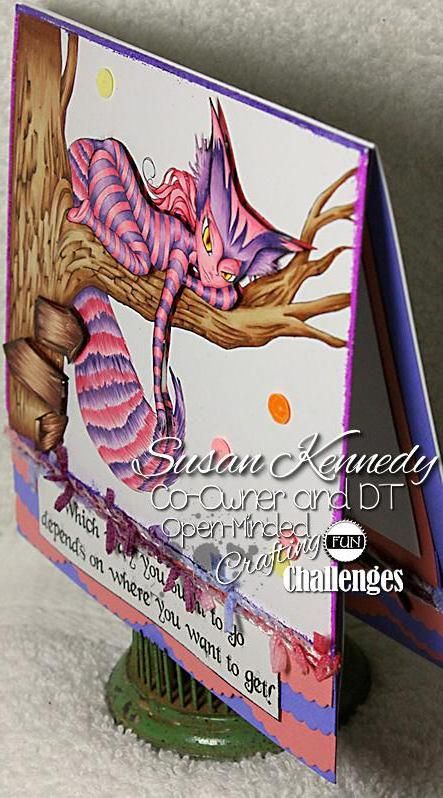
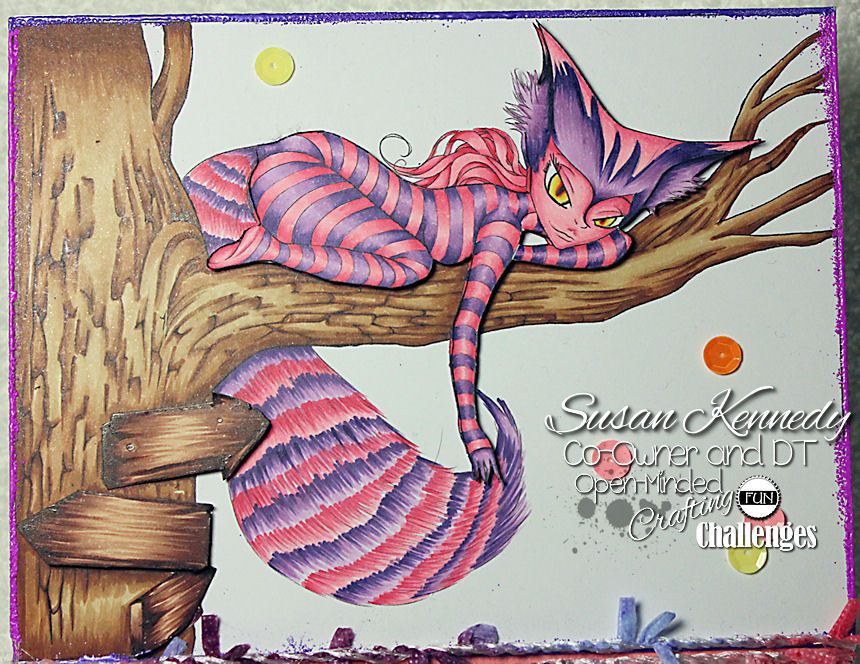
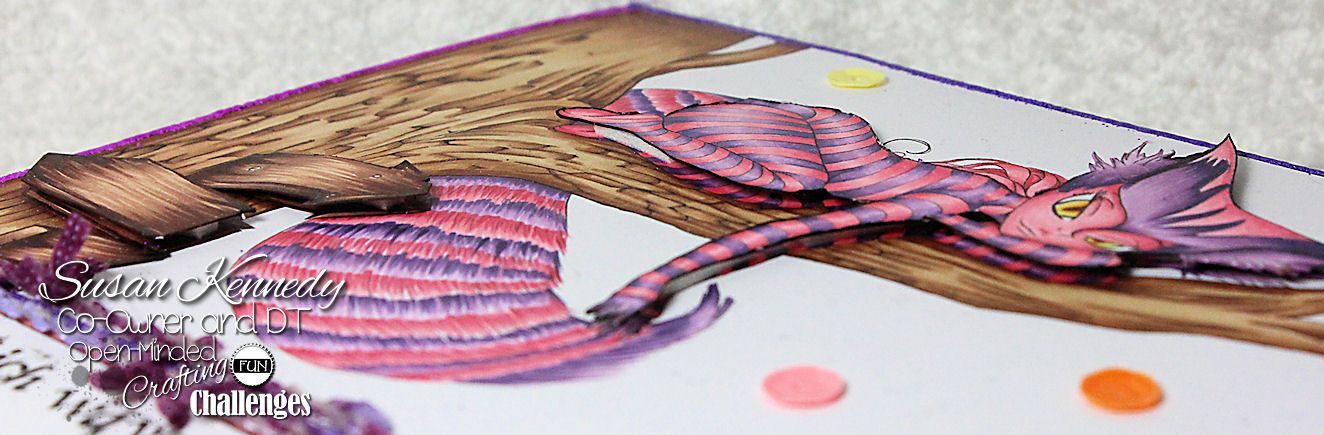
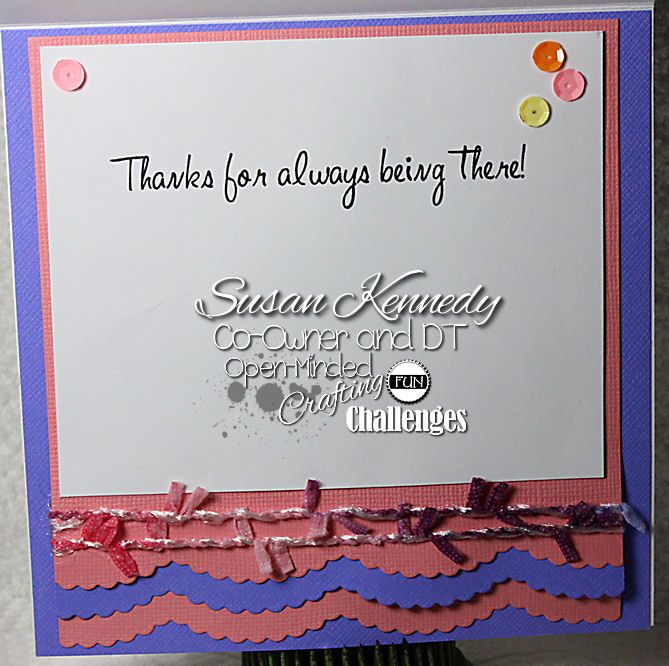
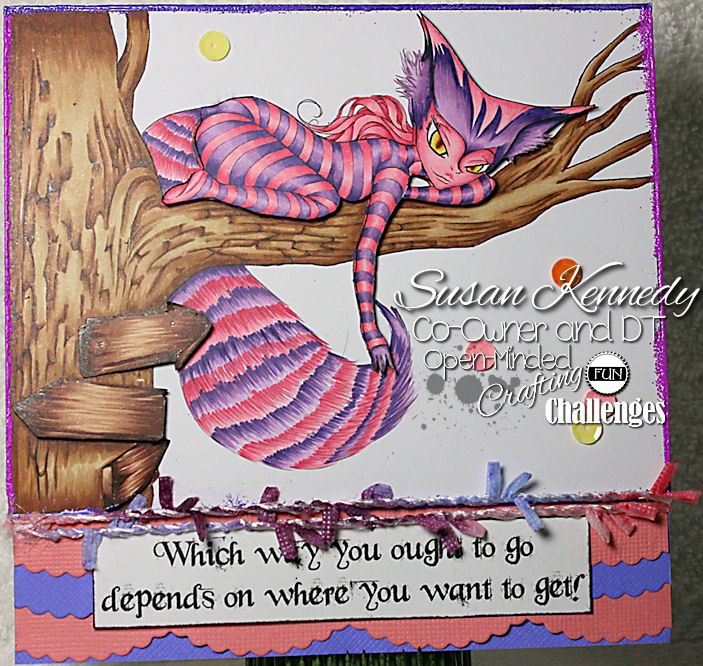
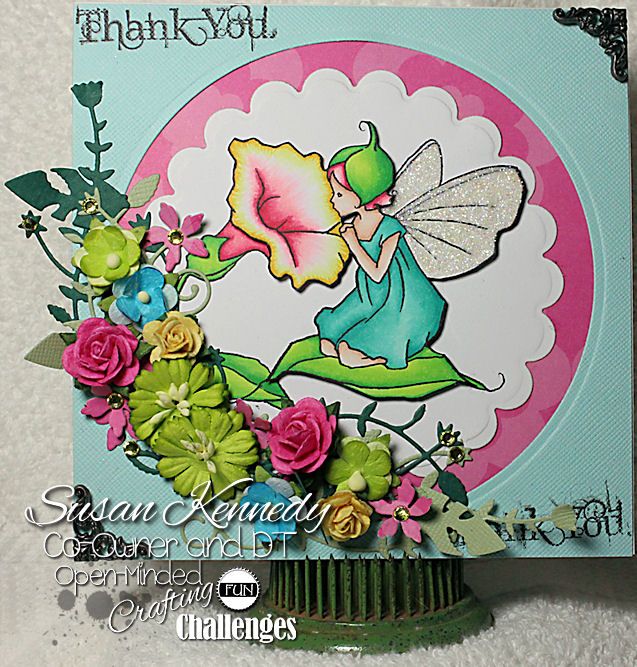
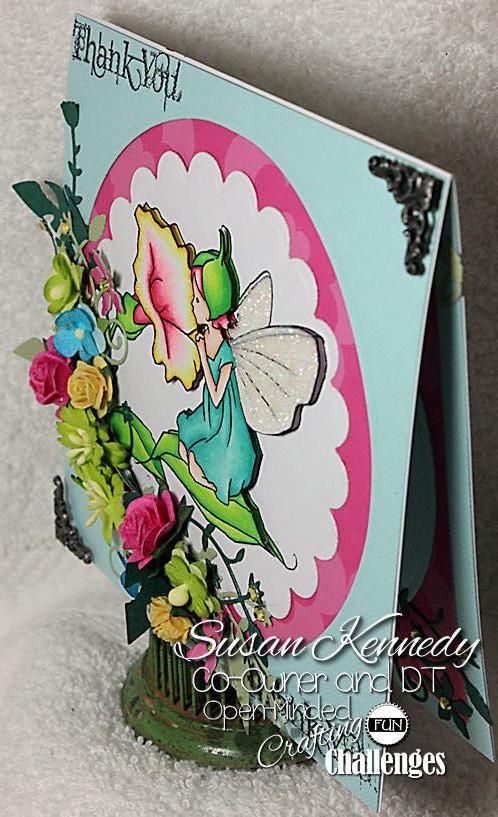
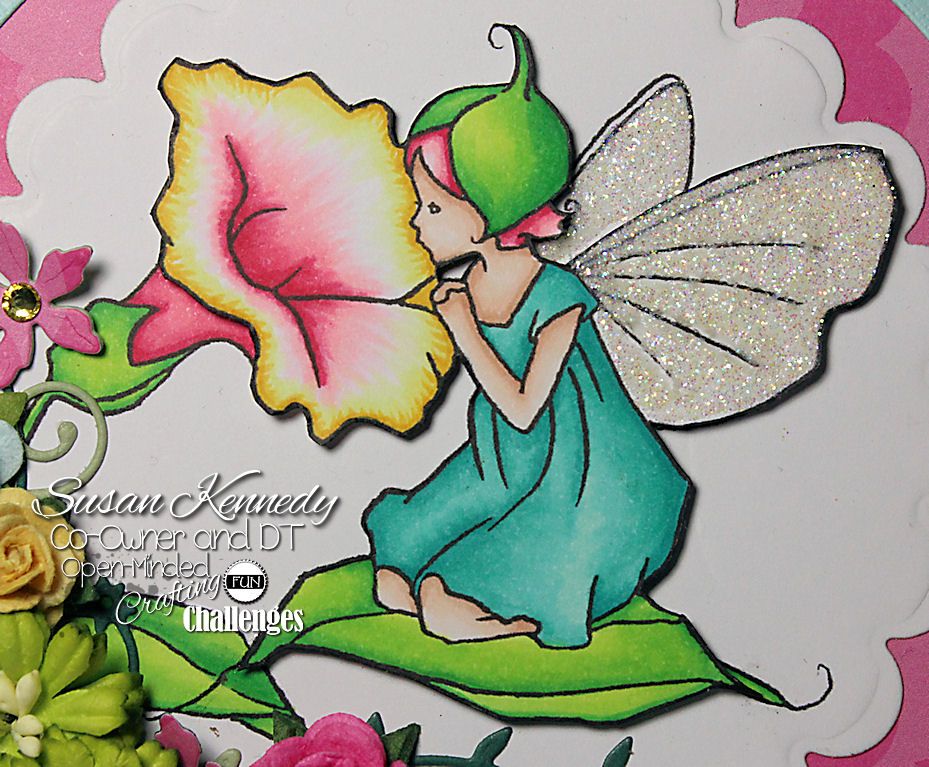
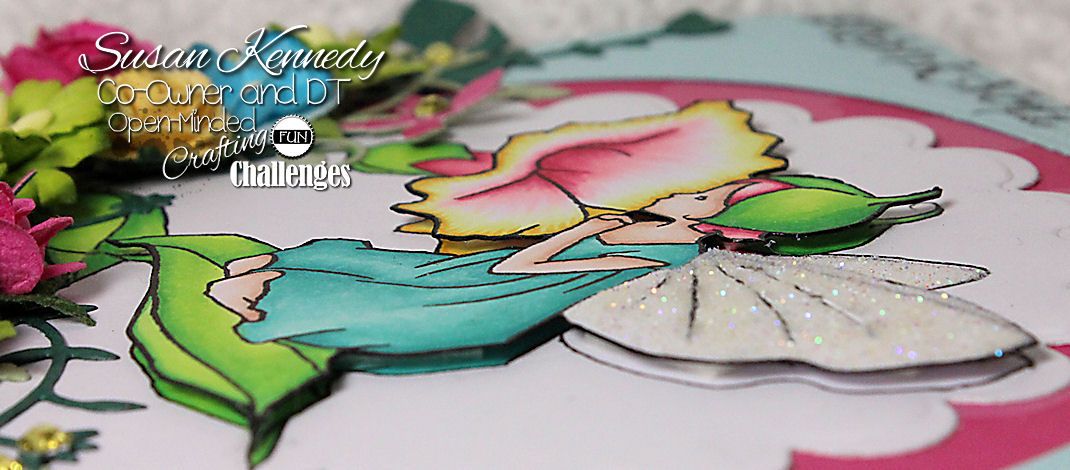
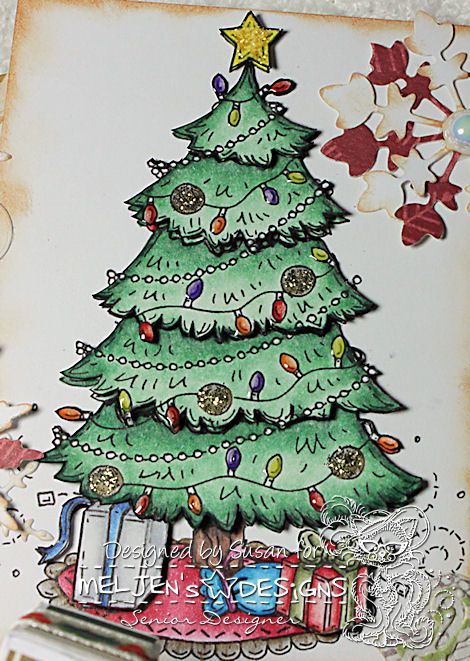
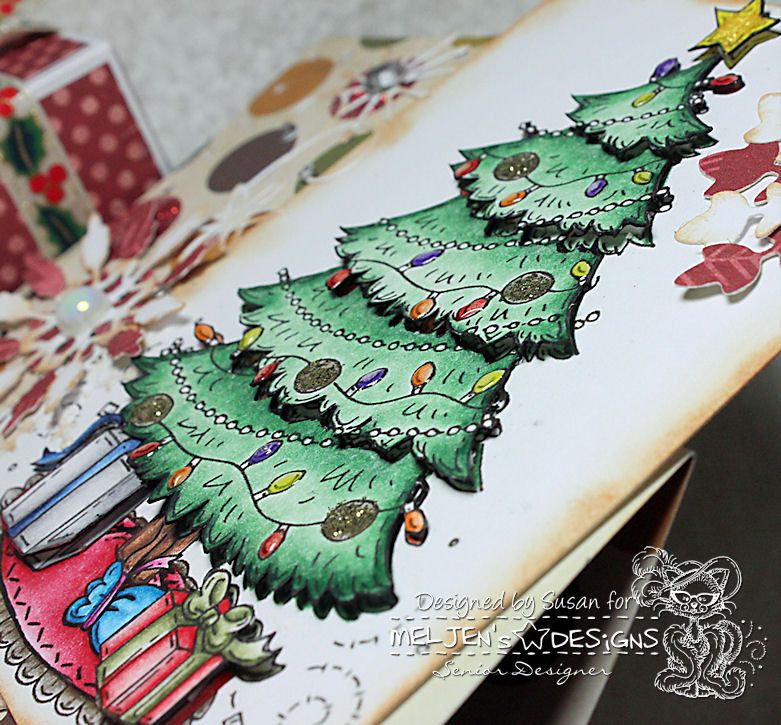
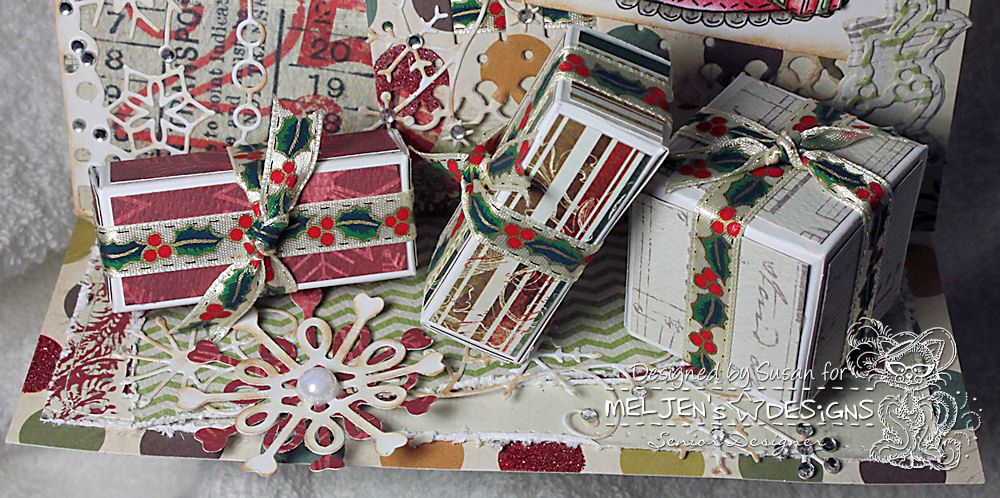
So for this one I just mostly used the image LOL It was BIG! :)  But I just LOVE this image so much!!!  I colored the image with my Copic Markers. I popped part of Lucy Loo Cheshire Cat and the arrows on the tree. I added the fibers, the layers of die cut edged papers at the bottom and the random sequins. I also did some purple and pink embossing around the edge of the image as a frame. On the inside I used most of what I used on the outside as well.

Copic Markers Used:
  • Tree: E31, E34, E35, E37
  • Signs: E21, E25, E39
  • Cat: V12, V15, V17; RV23, RV13, RV14
  • Eyes: Y11, Y15; YR07, YR09
Challenges:


Midway Post #1 for Challenge #24 at Open-Minded Crafting Fun!.

Good morning everyone!!  Today I have two midway posts for you.. this is my first one :)  Also, the winners are posted for Challenge #23.. be sure to head over there and see the winners and DT Favorites!!

We have some wonderful sponsors for Challenge #24 .. be sure to join us :)  One more week to go!!


Here is what I have come up with using an image from A Day For Daisies:


For this post I've used Blessing A Flower Fairy from A Day For Daisies. I colored her with my Copic markers. I've added white glitter to her wings. I cut a large hole in the center of the card and added the pink paper behind it. I cut the die using a scalloped circle die. I added the die cut leaves and swirls and then added the flowers on top of those. I then added some gems around and the metal corners. I stamped the Thank You. I did just a small amount of decoupage on this. I popped the top of the flower, the leaf and fairy and her front wing. On the inside I used some additional swirls with gems. And that circle that I cut out from the front... well.. I used that on the inside :)

Copic Markers Used:
  • Skin: E000, E00, E01, E11
  • Leaves: YG01, YG05, YG09
  • Dress: BG11, BG13, BG15, BG49
  • Flower: Y00, Y11, Y15; RV00 RV21, RV23, RV25, RV29
  • Hair: RV00, RV23, RV25, RV29

Challenges:


Thursday, November 27, 2014

Whiff of Joy December Project.

Good morning! And a Very Happy Thanksgiving!! I hope everyone has a wonderful day and rest of your weekend!! :)

Today I am sharing my Whiff of Joy Project for November. We are sharing Christmas Decorations:


For my project I made this little Drum using my Silhouette Cameo and a file from SVG.Cuts. I used assorted scrap papers from Christmas last year and I added twine, brads and tinsel. This is open on the inside so I can fill it up with Chocolate or Candy Canes! I used Angel Maya on the drum. I did a bit of decoupage on her. She is colored with my Copic Markers.

Copic Markers Used:
  • Skin: E000, E00, E01, E02, E11
  • Star and Halo: Y00, Y11, Y15, Y38, YR24
  • Hair: YR20, YR23, E33, YR24
  • Dress: R35, R37, R56
Challenges:


Wednesday, November 26, 2014

November Cuddly Buddly.

Good morning!

Today I am sharing my second Cuddly Buddly post with you for November:


I decided to use the Budding Vine Corner from Lilyboo's Pretty Cottage. Once I had those colored up I knew that I wanted to do just a pretty simple card, but I needed some fantastic sentiment to go in the middle. And what better sentiment to put in the middle but a wonderful scripture!!  And then I found Kim MacFarlane's Holy Scriptures and I knew I had found what I wanted. I saw this scripture which she put into the shape of the Cross and I just LOVE it!! That is when it came together. I colored the corner with my Copic Markers. I added some stitching, some Embossing Enamel and the pearls. It is a pretty simple card for me, but I don't think its quite CAS. LOL  Oh well! Maybe it would be considered CAS to some? I'm not even sure! That is how CAS illiterate I am!! I also inked around the white paper with Rose ink. I layered the same papers on the inside and added some stitching and pearls to finish it off.

Copic Markers Used:
  • Flower: R20, R22, R24
  • Leaves: YG01, YG05, YG09
  • Vine: E31, E34, E35, E37
Challenges:

Tuesday, November 25, 2014

Meljen's Designs November DT Inspiration.

Good morning everyone! I think I feel a little bit better today. I haven't decided yet LOL  I hate being sick! Today is my son's birthday... so Kevin is out with my youngest doing some shipping for cake and stuff. That's my day! Hoping to feel a bit better.

So, today is my inspiration post at Meljen's Designs. I have been wanting to try this creation for a while now and when I decided which image I was going to use this month I decided that this was the image to use for this:


So, I think they are classifying this as a card, but I'm going with a Christmas Decoration LOL!! I didn't add a sentiment and the gifts are all glued down, so there is really no way to fold this up and put it in an envelope. For that... I think it justifies calling it a Christmas Decoration! I'm trying to decide if I should keep it and put it out at Christmas or if I should give it as a gift... to my mother or something! I'm just not sure! Anyway!!  I used Christmas Tree which you can find at the Meljen's Designs Shop. I LOVE this image! I think I use it every year LOL I just LOVE to decoupage it!!  It is perfect! I decoupaged each layer of the tree and then the gifts. I have inked everything in Tea Dye ink. I used a bunch of random Christmas paper scraps from last year to create this. I used ribbon around each gift. I layered the snowflake dies.. those are Sizzlits. I also added a small snowflake corner.. I believe that is Memory Box, but I'm not 100% sure. I also added a Holly corner that is sort of hidden behind the square gift at the bottom. There are also two snowflake border die cuts.. I know that those are Memory Box. I added white pearls to the large layered snowflake centers. I added small gems on some parts of the snowflake corner and border dies. The star on the tree and the ornaments have some Stickles on them and the lights have some Diamond Glaze on them. Hard to see that in the photos. I distressed the layers of paper on the bottom and inked the dies and the paper around the image. The image is colored with Prismacolor Pencils and Gamsol  And I think that is about it! It took me 2 days to make this... well... that isn't counting the coloring and decoupaging.. with that I would say 3 days. It was really fun to make though! I doubt I will do another though!!

Challenges:


Monday, November 24, 2014

SLSLines DT Inspiration.

Good morning! Boy do I feel rotten today!! I have been down for a couple of days now. All congested.. My chest is hurting. Was running a fever yesterday. Just icky!!  I just want to feel better!!

Today I am sharing my November DT Inspiration with you from SLSLines Digital Stamps.


I love her! She is Goth Girl with Top Hat and can be found at the SLSLines Shop. I colored her with Copic Markers. I did a little bit of decoupage. The glasses were filled with Diamond Glaze. I embossed the black in the back  and then stitched around it. I also distressed the edges of the black papers. I used a Spellbinders die to cut the piece at the top. I used My Favorite Things stitched circles dies for all of the circles. I also added some gems at the bottom.

Copic Markers Used:
  • Skin: E000, E00, E01, E11, E13
  • Hair: Y21, Y23, YR21, Y28, E97, E99
  • Shirt and Hat: V15, V17, BV08
  • Hat Band, Glasses and Black Under Eyes: C3, C5, C7, C9
  • Lips and Rose: YG01, YG05, YG09
  • Eyes: E41, N3, N5
  • Charm: N3, N5
Challenges: